
A seed of Valeriana officinalis and a seed of Rhus typhina may both appear quiet and dry in a packet, yet they can be waiting for entirely different signals. Understanding seed stratification versus scarification methods prevents a common and costly mistake: applying cold to a seed that needs its coat opened, or abrading a seed whose embryo is still physiologically dormant. For collectors growing unusual trees, medicinal plants, and wild-origin ornamentals, the distinction is part of treating seed as living botanical material rather than a generic commodity.
Seeds do not all delay germination for the same reason. Dormancy is an adaptation, shaped by climate, season, fruit structure, fire, animal dispersal, and the conditions a species encounters in its native range. In cultivation, the goal is not to force every seed into growth. It is to provide the environmental cue that tells a viable seed it has reached an appropriate moment to germinate.
Stratification addresses internal, physiological dormancy. The embryo is alive, but biochemical processes must proceed before germination can begin. A period of moisture at a specified temperature, often cool but sometimes warm followed by cool, allows those processes to occur.
Scarification addresses physical dormancy. Here, a water-resistant or unusually hard seed coat prevents moisture and oxygen from reaching the embryo. The seed may be fully ready to germinate as soon as that barrier is breached. These are fundamentally different problems, so the treatments are not interchangeable.
Some species have both physical and physiological dormancy. Their seeds require scarification first, then stratification. This is one reason broad advice such as “soak overnight and refrigerate” can be unreliable, especially with uncommon species and wild-collected lineages.
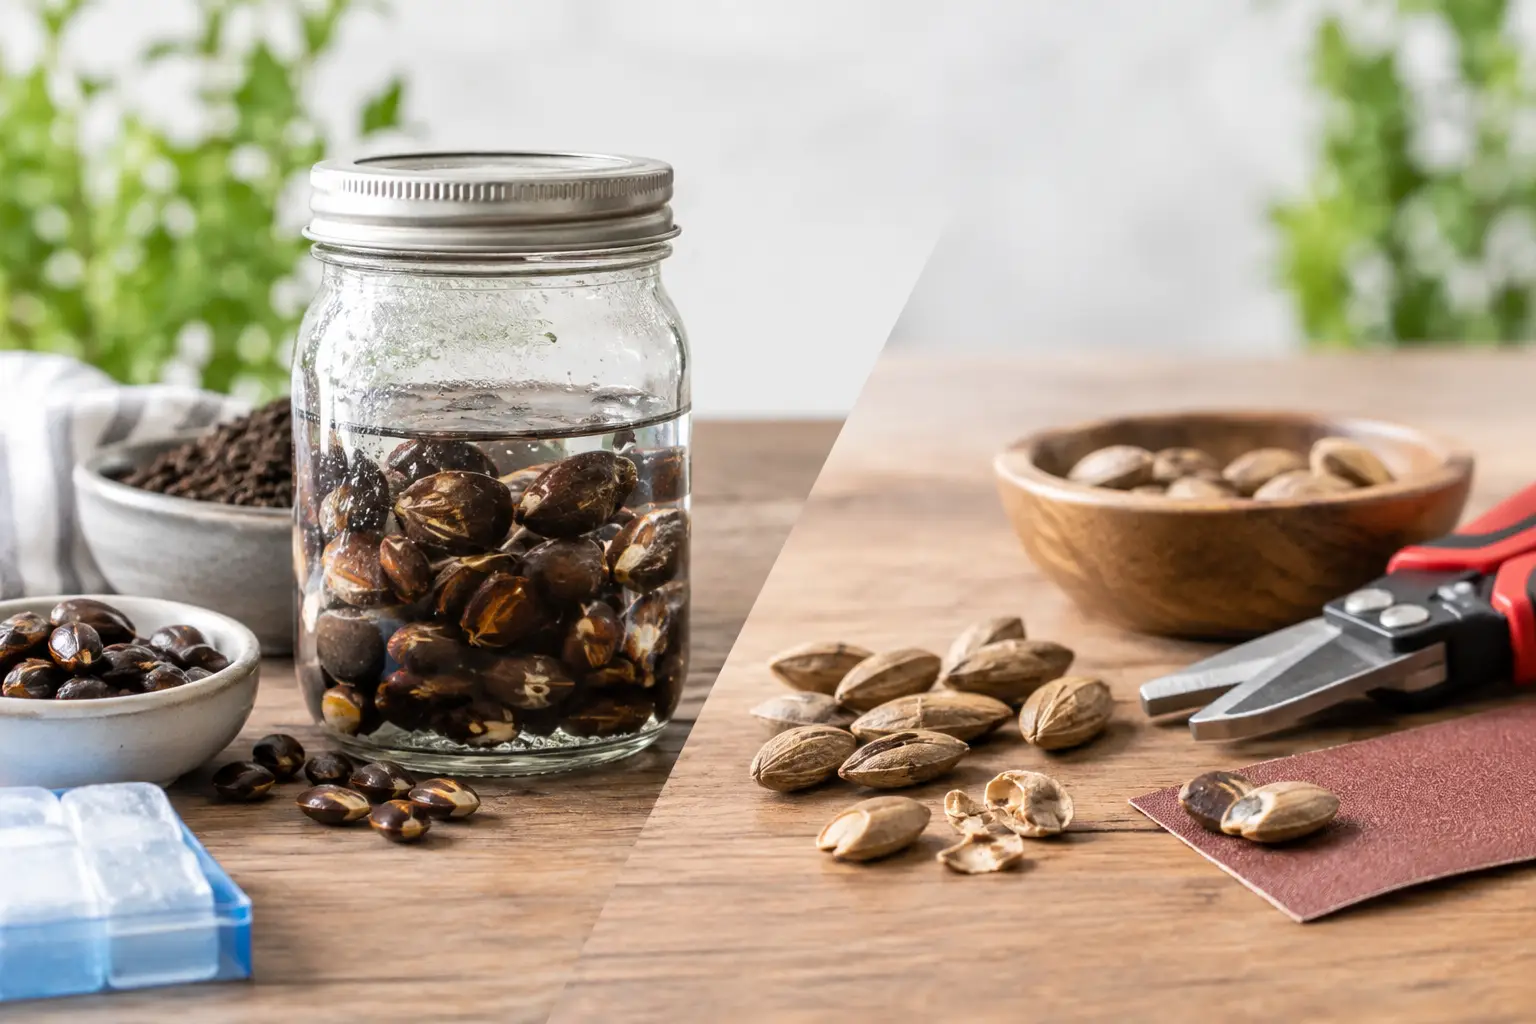
Cold stratification recreates a moist winter. Seeds are held in a barely moist, clean medium such as vermiculite, milled sphagnum, or a fine seed-starting mix, then kept at refrigerator temperatures, generally around 33 to 41 F. The duration may range from a few weeks to several months, according to species and seed provenance. The medium should feel damp, not wet enough to release water when squeezed.
Warm stratification is less commonly discussed, but it matters for some woody and temperate species. A seed may need a warm, moist interval that resembles late summer or autumn before it can respond to winter cold. In species with complex dormancy, this sequence can be essential.
Scarification, by contrast, creates a small point of entry through a hard seed coat. Mechanical scarification uses sandpaper, a file, or a careful nick away from the embryo. Hot-water treatment softens some coats: seeds are covered with hot, not boiling, water and allowed to soak as the water cools. Chemical scarification is used in some professional or research settings, but concentrated acids present real hazards and are rarely appropriate for a home grower.
The practical difference is simple. Stratification is a matter of time, moisture, and temperature. Scarification is a matter of altering the coat so water can enter.
Seed size and texture can offer clues, but they are not instructions. A large, glossy, extremely hard seed often suggests a physically dormant coat. Many members of Fabaceae, for example, are known for hardseededness. Yet family-level patterns are only a starting point. Germination requirements can vary between closely related species, populations, and even seed lots.
Seeds from plants native to cold-winter climates are more likely to need cold stratification, particularly perennial herbs, shrubs, and trees that must avoid sprouting during a brief autumn warm spell. Small seeds are not exempt. Many temperate woodland and meadow species require a cold, moist period despite having delicate-looking coats.
Fruit ecology also matters. A seed adapted to pass through an animal digestive tract may possess a coat that benefits from abrasion, microbial activity, or extended weathering. Seeds adapted to fall, freeze, and thaw under leaf litter may require stratification. Fire-associated species may respond to smoke, heat, or charred conditions rather than either standard treatment.
The most reliable path is always species-specific information based on the scientific name. Common names can conceal very different taxa. Even when a treatment is well established, think of it as a tested approximation, not a guarantee. Freshness, storage history, and the origin of the parent plant influence results.
Begin with clean containers and a labeled packet or bag. Use a medium that holds moisture while allowing air around the seeds. Combine the seed and medium, adding water gradually until the material is evenly damp. Excess water encourages mold and can deprive seeds of oxygen.
Seal the mixture in a small bag or lidded container, leaving some air space, and label it with the botanical name, date, and intended treatment length. Place it in a refrigerator rather than a freezer. Avoid storing it beside produce if possible, since ripening fruit can release ethylene, which may affect certain seeds.
Inspect the seeds every one to two weeks. If the medium is drying, add a few drops of water. If mold develops, remove visibly affected material and refresh the medium. A light fungal presence does not automatically mean the batch is lost, but a sour smell or soft, collapsing seeds calls for a closer assessment.
Check for germination before the planned stratification period ends. Once a root emerges, sow that seed promptly and handle it by the coat, not the new root. Waiting until every seed has responded can sacrifice the earliest and often strongest germinators.
Mechanical scarification is usually the most controlled option for a small, valuable seed lot. Rub one small area of the coat with fine sandpaper until a paler inner layer becomes visible. Stop before reaching the embryo. On flattened or bean-like seeds, work on the side opposite the hilum, the small scar where the seed attached inside the fruit.
For very hard, rounded seeds, a nail file can be easier to control than a knife. The objective is not to split the seed. It is simply to create a route for water uptake. After scarifying, soak the seeds in room-temperature water for several hours or overnight, then sow them in a suitable medium.
Hot-water scarification is useful when working with larger quantities of appropriately hard-coated seed, but it offers less precision. Water that is actively boiling can cook embryos, particularly in smaller seeds. Use freshly heated water, pour it over the seeds, and let it cool naturally. Seeds that swell are often ready to sow; seeds that remain hard may need a second, cautious treatment or a small mechanical nick.
Do not scarify soft, thin-coated, damaged, or already swelling seeds. Their barrier has already been compromised, and extra abrasion can invite rot or destroy the embryo.
Combination dormancy is common enough to deserve patience. A seed can have a hard coat that blocks water and an embryo that still requires seasonal conditioning. In this case, scarification generally comes first. The coat must allow moisture in before a moist stratification period can do its work.
The reverse order may occasionally be specified in technical protocols, especially where natural weathering is part of the process, so species-level guidance should take precedence. But the principle remains: identify whether the seed coat, embryo physiology, or both are delaying germination.
For a collector’s small batch, it can be sensible to divide the lot. Treat one portion according to the best available protocol, while reserving a smaller portion for a modest variation in duration or method. Label each group carefully. This is not guesswork when done thoughtfully. It is a way to learn from a rare species without risking every seed on one assumption.
The usual failure in stratification is too much water. Seeds need moisture, but they also need oxygen. A saturated bag placed in the refrigerator is more likely to produce decay than seedlings. Another mistake is using a freezer, which may damage seeds that are meant to experience cool, unfrozen soil.
With scarification, the chief error is overdoing it. A deeply cut coat is not better than a lightly thinned one. The embryo occupies more of the seed than many growers expect, and damage may not become apparent until the seed fails after imbibition.
Timing creates confusion as well. Germination after treatment is not always immediate. Stratified seeds can still require warmth, light, darkness, alternating temperatures, or weeks of ordinary sowing conditions. Scarified seeds may germinate quickly, but only if temperature and medium suit the species. Treatment removes a barrier; it does not replace the rest of a plant’s ecological requirements.
A curated seed collection is most rewarding when each species is approached on its own terms. Record the botanical name, treatment dates, temperatures, medium, and germination observations. Over a few seasons, those notes become more valuable than generalized rules, particularly for distinctive taxa that seldom appear in standard garden-center instructions.
Patience is not passive in seed growing. It is the practiced attention of providing one precise condition, observing the response, and allowing the plant’s own biology to set the pace.